
Home server with Raspberry Pi
Set up the perfect Raspberry Pi Ubuntu server
Foreword: This guide simply describes how to set up a performant and reliable Ubuntu server on a Raspberry Pi. For about 50-150 USD you will have a fully functioning server that can be used as a media server, smart home hub, ad blocker, retro gaming station, personal hosting platform, and a huge array of other applications! It will also be a perfect introduction in the fascinating world of open source, IT and DIY.
Hardware
Why a Rpi
You could run an ubuntu server from pretty much anything, and actually if you have an (relatively) old laptop laying around, it could be a great idea. However, here are a few reasons why a Rpi is a great option:
- affordability: relatively cheap
- low power consumption, footprint & noise: as an always on device, it’s a plus
- large resource and tutorial: any issue you will face have been answered somewhere in the first few google search results
- GPIO pins: opens a wide range of applications (I used my Rpi to flash software in Zigbee devices)
- open source: embrace open source from the start!
In fact, I started my home server on a Rpi4, thinking I might upgrade to something beefier someday… This was 2 years ago at the time of writing and this same Rpi still serves me daily!
Hardware list
Core:
| Option | Description | Cost |
|---|---|---|
| Raspberry Pi | Raspberry Pi 3 and 4 are fine depending on your budget. | 35-75$ |
| Compatible power supply | Often sold with the Rpi. otherwise see recommendations. | 0-10$ |
| SD card | To store the Raspberry Pi OS, not used after first boot if you do SSD mode (you should). | 10-30$ |
| A computer | To setup the server. Any computer will do | out of budget |
Optional: (recommended for performance and reliability)
| Option | Description | Cost |
|---|---|---|
| HDD | to store large quantity of files and media | 50-70$ |
| SSD and USB adapter | the SSD mode is really unleashing the full potential of Rpi as a server. see below | 30-40$ |
| powered USB hub | required to supply extra power for SSD and HDD | 15-20$ |
| case + fan | At this point, a case and a fan can be useful too | 10-20$ |
Here is a list of everything you will need to run your ubuntu server with a Raspberry Pi. As we will run headless (= no Graphical User Interface), you do not need any HDMI cable for this guide.
Before buying a SD card or a SSD disk, read on to the SSD mod section.
Assembly
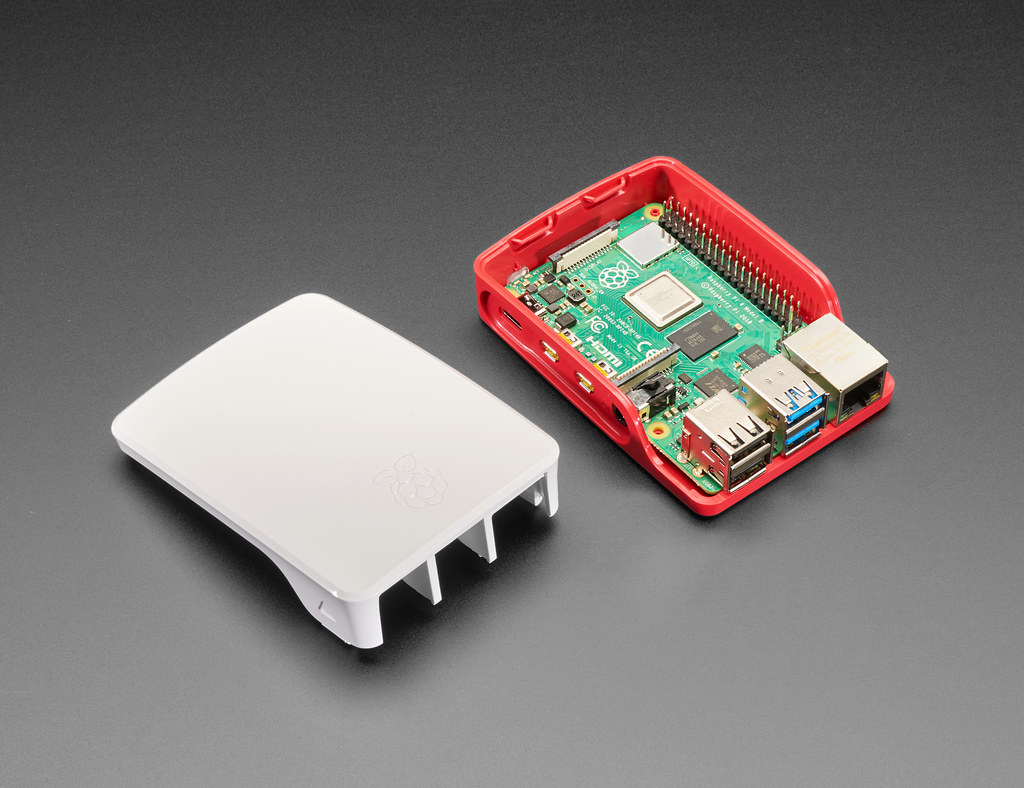
- just plug everything in
- really, there’s not that much to it
For the first set up, keep the Pi close to your PC. Later on, I have found that putting it close to the router, connected through ethernet was most comfortable for me.
For Raspberry Pi 4, you will need a fan to prevent CPU throttling (slowing down) during intensive use. You do not need that much air flow to keep your CPU cool, however fan can be a bit noisy. As my Rpi is close to my TV, I wanted it to be silent. What I did is I bought a 12V fan, that I hooked up to the 5V GPIO pins of my RPi4: the fan runs slower and is practically silent.
SSD mod
SD cards are not a good solution to run an OS from: they easily get corrupted and have a slower read and write speed compared to a SSD disk. I suggest to start with a SD card you have laying around somewhere (from a camera or an old phone maybe). It will allow you to test things out and you can do the SSD mod after, at which point your Raspberry Pi will boot directly from SSD and will not need this SD card anymore.
Warning: Compatibility can be tricky for SSD boot. If you go with the recommended links in the hardware list above, it will work fine. If you use other brands and models, please cheack compatibility against the list in this post
Software
Write OS image to the SD card
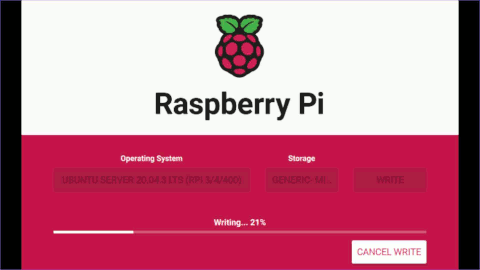
Write the SD card with Raspberry Pi Imager (Windows, Linux and macOS).
- Connect the SD card to PC (through built-in/USB reader), and format it
- Open Raspberry Pi Imager and click “choose OS” => “other general purpose OS” => Ubuntu Server 20.04.3 (or higher) LTS 64 bit
- Choose SD card (if SD card is not recognized)
- Click on advanced options and fill in the following options:
- hostname: raspberrypi
- enable SSH - use password authentification
- set username and password (write it down)
- configure wifi (input SSID and password)
- for good measure, set locale settings
- Click “write” and that’s it!
First boot
For the first boot, do not plug anything else than the Rpi with its power supply and SD card. Eventually, you can plug an ethernet cable but if you have set up wifi at the previous step, it is unecessary.
Warning: During your first boot a tool called cloud-init is doing configuration. Give it a few minutes before going trying to connect to your Rpi.
Find out the Rpi ip address
There are a lot of ways to find the ip from your Rpi. But let’s review the 2 simplest ways:
- connect to your router (you will need to access it anyway to set up a static adress and/or expose some ports once you start using your Rpi more)
- use the following command:
- Copied!
arp -na | grep -i "b8:27:eb" # if first line do not work (for recent models of Rpi4) arp -na | grep -i "dc:a6:32" -
arp -a | findstr b8-27-eb
# if first line do not work (for recent models of Rpi4)
arp -a | findstr dc-a6-32
Your Raspberry Pi ip might change after reboot because your router assign ip adresses dynamically by default on your home network. I recommend switching to static IP later.
Connect with ssh
let’s connect to our instance with SSH. If you are using an older version of Windows, and did not join the cool kid gang using WSL, you will need an extra step here: to install Putty.
It is a good moment to remind you that exploring the world of open source and general geeking will be a far more pleasant experience from a Linux environment, and WSL is the painless way to access the full potential of Linux from the comfort from Windows
-
# eg.: ssh rpi@192.168.1.85 ssh user@ip -
# eg.: ssh rpi@192.168.1.85 ssh user@ip -
# use Putty! :(
Now that we are logged in our server, the first thing to do is to update.
sudo apt update
sudo apt upgrade
And voila! You are ready to enjoy your fully functional server.
If you want your Rpi to be much faster, keep reading!
Boot from SSD
Write OS image to SSD
Repeat the steps of Write OS image to the SD card but write on your SSD instead of SD card
Enable boot from USB mass storage
For Raspberry Pi 4 & B+
For most Raspberry 4 & B+, this is enabled by default so go ahead and try it: remove the SD card, plug in SSD and power up. If it succeeds, you are done, congrats!
If it did not, you simply need to first boot from a SD card written with an image that enables USB mass storage boot. Simply use the RPi imager again. When selecting the OS do:
Choose OS => Misc utility images => Bootloader => USB Boot
Boot up once with this SD card, then shut down the Rpi and boot from SSD!
For other Raspberry Pi
For older Rpi (2B, 3A+, 3B), it is slightly more complicated: we will need to use Rasbian from a SD card to enable USB boot.
-
First, write raspbian to a SD card following the steps of Write OS image to the SD card.
-
Boot from that image, ssh to your Rpi and execute the following command
# update the packages
sudo apt update
sudo apt upgrade
# enable boot from USB
echo program_usb_boot_mode=1 | sudo tee -a /boot/config.txt
# reboot
sudo reboot
- wait for the Rpi to restart and do:
vcgencmd otp_dump | grep 17
if output includes 3020000a, you won!
- you remove SD card and boot from SSD
warning: When booting up a Rpi which is connected to a powered USB hub, the Rpi can decide to draw power from USB. To avoid that, wait 2 or 3 seconds before plugging the USB hub after powering up the Rpi.
Some USB adapter, although compatible can cause boot to take much longer. After boot everything will work fine.
If you cannot see your Rpi connect to your network after booting from SSD, wait about 10 minutes before trying again. Also, the ip might have changed. In that case, refer to Find out the Rpi ip address
Conclusion
Here you are, you have a fully functional and performant Ubuntu server! In another post, I want to write about how I use mine to run some docker containers for media server and smart home hub!
tip: Should you have any trouble following this guide, have a look at the detailed Raspberry Pi official documentation and the ubuntu Rpi tutorial.
There are currently no comments on this article, be the first to add one below
Add a Comment